# Alpine Install: from a disc to pc engine APU single only boot
**Overall description:** Alpine Installation from an official image tar
file downloaded to a real second generation PC Engines APU systems
(apu2, apu3, apu4), where it will be single OS only.
This document will guide you to **install Alpine into second generation
PC Engines APU systems**, it was tested with an apu2d4 and Alpine 3.11.6..
Feels lost here? check [How to use this guide](#how-to-use-this-guide) section of this document
## Terminology
- **[UEFI](Alpine_and_UEFI.md)**: it\'s a new system included
in every new hardware machine laptop or desktops, that will manage
the early boot process as a little operating system, see more in the
[Alpine and UEFI](Alpine_and_UEFI.md) page.
- **New machine**: will be your real machine fresh and ready to
install your new Alpine operating system, with an installed ISO
image where to put the downloaded media installation.
- **Bootable USB**: will be your hardware drive input to put the image
downloaded iso media with the operating system Alpine to install as
source media; this drive are commonly named
[USB](https://en.wikipedia.org/wiki/USB) unit.
- **Serial console:** is an input port on the device.. DB9 serial port
for serial console, located at the board to use as char device, it's
common in those devices.
- **Source media**: will be the just burned / disc from the downloaded
iso file of Alpine operating system. Will be Attach to the serial
console to property boot the source disc as media installation.
- **Target media**: will be the storage medium device into the new
computer target where the Alpine files for operating system will be
installed, its one partition from the
[HardDisk](https://en.wikipedia.org/wiki/Hard_disk_drive) of the new
computer.
## Requirements
- A USBstick to just burn/record/write the ISO image installer as
the source media file downloaded
- In the new machine we need serial device port allowed to attach
- In the new machine we need at least 512Mb of RAM, but required 2Gb
of RAM for desktop/graphical applications
- In the new machine we need target media with at least 2G of hard
disk, but required 10G for desktops
- Will need to previously downloaded and write the Source media ISO
file from
## Preparing the source medium to install
Download the source medium to install and put into your home documents
in a modern computer. The source medium to install in this case are
**just 64-bit only**, the download URL will be as following format:
`http://dl-cdn.alpinelinux.org/alpine/v/releases//alpine-standard-.0-.iso`
where `ARCH` and `VERSION` could be:
- `` could be one of:
- **x86_64**: The popular AMD64 compatible 64-bit x86 based
machines, i386 are not recommended for newer/lasted hardware.
- `` could be one of:
- **latest-stable** for a more up to date without taking care of
numbered
- **3.12** the most recommended for machines between 2016 to 2018
EXAMPLE if you plan **to using 3.12 version the available links to download will be:**
- for **x86_64** computers:
`http://dl-cdn.alpinelinux.org/alpine/v3.12/releases/x86_64/alpine-standard-3.12.0-x86_64.iso`
**Usin Graphical download way**: Just point the web browser to that url and the
download of the iso file will start. A file with **.iso** extension
type, with name like `"alpine-standard-3.17.0-x86_64.iso"` (if amd64) or
like `alpine-standard-3.12.1-x86.iso` (if i386); will be downloaded
commonly into the Download directory of your home documents filesystem.
**Usin Command line method way**: in unix-like terminal execute:
`wget -c -t8 --no-check-certificate http://dl-cdn.alpinelinux.org/alpine/v3.12/releases/x86_64/alpine-standard-3.12.0-x86_64.iso`,
and where you run the command, in that place/dir will be downloaded the file.
## Booting the Alpine ISO disc
1. It's probably a good idea to ensure that the BIOS / Firmware is up
to date.
2. Create_a\_Bootable_USB thumb
drive with the current standard x86_64 image from the downloads
page.
3. Attach to the serial console. Configure your terminal emulator for
115200 8n1.
4. Power on the APU.
5. When BIOS prompted, hit F10 and select to boot from USB.
6. At the boot prompt, **quickly** type a slash to interrupt the
default boot, which has a short timeout.
7. Continue entering the remainder of this command at your leisure. It
should have only one slash at the start, to be clear:
`/boot/vmlinuz-lts modules=loop,squashfs,sd-mod,usb-storage nomodeset console=ttyS0,115200 initrd=/boot/initramfs-lts`
8. Alpine should come up as normal.
When the machine start, you must be sure to choose the optical drive
(commonly named CD/DVD Rom drive), so the disc/iso will boot and after a
while a command line shell will show you:
> **Note** When starting Alpine it will ask for the login, just typing root and pressing enter allows you to start:
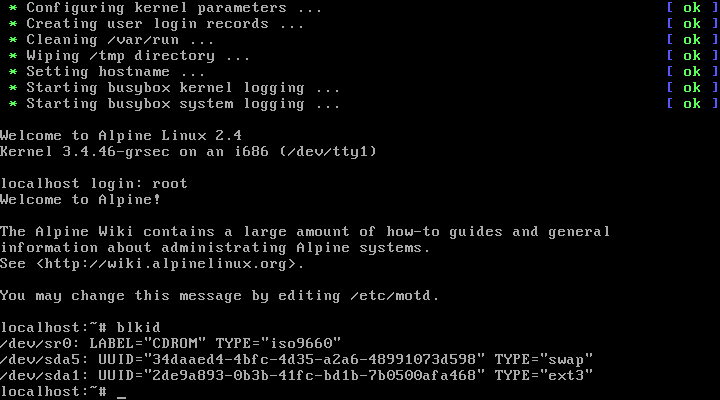
#### runing the setup script
After entering the root environment and gets the console prompt installation media,
you must perform these commands, that will:
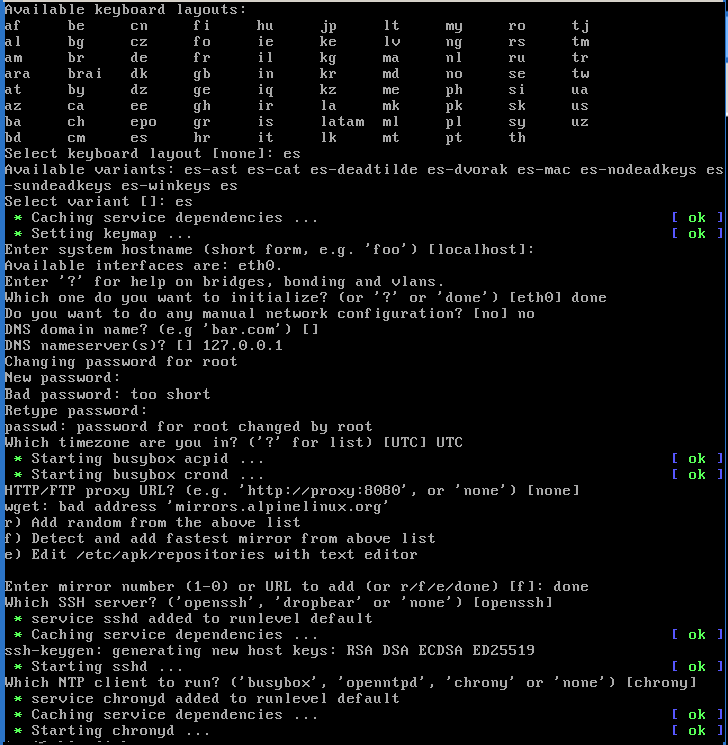
This will start some questions, these are in the following order:
* keyboard and variant, example for Latin is esand afteres-winkeys
* hostname: just hit enter, it's the name of the computer.
* Network options: select the `eth0` one that is the network cable and answer `dhcp`.
* DNS Options: It is recommended to use `8.8.8.8 ` and `none` for the domain
* Time zone options: Just use the suggested defaults.
* Proxy Options: Use noneif you are connecting directly to the Internet.
* SSH Options: Use opensshthe package that already comes in the middle.
* NTP Options: Use chronythe packet already in the middle.
* Mode: Select `sys` to install the system on disk.
## After reboot
1. **Before** rebooting, edit /boot/extlinux.conf.
- Add `SERIAL 0 115200` as the first line in the file.
- In the `APPEND` line, replace `quiet` with
`console=ttyS0,115200`
2. Remove the thumb drive.
3. Cross your fingers and reboot. The system should boot properly with
console on serial.
4. Edit `/etc/update-extlinux.conf` so that if extlinux.conf is
regenerated it will retain these settings:
- Update the line with `serial_port` to read `serial_port=0`
- Update the `serial_baud` line to read `serial_baud=115200`
- Update the `default_kernel_opts` line to replace `quiet` with
`console=ttyS0,115200`
5. Run `update-extlinux`
6. Examine `/boot/extlinux.conf`.
- Make sure it looks OK. Compare with /boot/extlinux.conf-old.
- If something looks wrong,
`mv /boot/extlinux.conf-old /boot/extlinux.conf` to roll back
the changes and try to figure out what went wrong
7. Cross your fingers and reboot. The system should boot properly with
console on serial.
## How to use this guide
This guide **structure all the commands in blocks, each block its separated by a line spaced**,
so you must **type each line as is.. and hit enter**, so you noted that then you
typed each separated clocks of commands, copy/type only blocks separated by an empty line,
all new(next) lines are made by just enter. the terminal will detect if must execute or not.
This guide is for install process, many parts will need you understand minimal
knowledge of linux.
This guide assumed you have a serial port allowed in the targeted computer, also
its important you shuold understand the way of the configuration in this guide.
> **Warning** Some Linux or/and Mac terminals have security cut/paste locks, so
if you paste, the first line will be preceded by garbage, check always the first char of your paste.
## Licensing clarifications
**CC BY-NC-SA**: the project allows reusers to distribute, remix, adapt, and build upon the material
in any medium or format for noncommercial purposes only, and only so long as attribution is given
to the creators involved. If you remix, adapt, or build upon the material, you must license the modified
material under identical terms, includes the following elements:
* **BY** – Credit must be given to the creator of each content respectivelly, starting at the first contributor.
* **NC** – Only noncommercial uses of the work are permitted, with exceptions if you fill an issue here!
* **SA** – Adaptations must be shared under the same terms, you must obey this terms and do not change it.
https://codeberg.org/alpine/alpine-wiki/src/branch/main#license
## See also
* [README.md](README.md)
* [alpine-setup-install-script.md](../alpine/alpine-setup-install-script.md)
* [alpine-tutorial-desktop-wayland-try.md](alpine-tutorial-desktop-wayland-try.md)
* [alpine-tutorial-desktop-xfce4-fast-forward.md](alpine-tutorial-desktop-xfce4-fast-forward.md)